
The Svxlink 17.12.2 was released recently on March, 2018.
Again, the installation procedure and some paths are difference with previous.
There are some changes since my last demo at YouTube in 2015, they are:
- Airport weather report source changed.
- Support RTL-SDR dongle for receiving channel.
Although the new installation procedure was described in the official website; but it is not a complete procedure. So let me show the whole steps.
Official forum for the new installation procedure:
https://github.com/sm0svx/svxlink/wiki/InstallBinRaspbian
The following steps show how to install the Svxlink to 17.12.2 to the latest Raspberry pi OS Stretch (date 28-4-2018).
Hardware I used is almost same as last article:
- Raspberry Pi 2B
- USB sound dongle, I use a cm108 sound dongle to reduce the background noise.
- USB to RS232 cord, for PTT purpose
- A DIY sound modem
First of all, install the Rpi OS to a SD card. The default working environment is graphical user interface (GUI).
We open a Terminal box, type the following commands to remove unnecessary package to save some SD card space.
sudo apt-get purge wolfarm-engine
sudo apt-get purge libre-office
sudo apt autoremove
Close the Terminal box, then config the Rpi Preference to boot up on CLI, graphic memory reduce to 16M only.

Please also config the time zone to your region, and keyboard to US.
Then restart to reboot to the CLI environment.
If you are using old model (version 2) of Rpi hardware, propose update the firmware before the installation.
sudo rpi-update
Unlike the previous articles described, do not plug the USB devices (sound dongle, and USB to RS232 cord) at the beginning. We just need the network, USB keyboard connected.
The first step add the Svxlink software repository.
echo ‘deb http://mirrordirector.raspbian.org/raspbian/ buster main’ | sudo tee /etc/apt/sources.list.d/svxlink.list
sudo apt-get update
Then install the svxlink package.
sudo apt-get -t buster install svxlink-server
After the installation, we remove the software repository.
sudo rm /etc/apt/sources.list.d/svxlink.list
Now we install the sound clips for the Svxlink.
cd /usr/share/svxlink/sounds/
sudo wget https://github.com/sm0svx/svxlink-sounds-en_US-heather/releases/download/14.08/svxlink-sounds-en_US-heather-16k-13.12.tar.bz2
sudo tar xvjf svxlink-sounds-en_US-heather-16k-13.12.tar.bz2
sudo ln -s en_US-heather-16k en_US
The installation guide told we may try to play the sound clip by run svxlink, it may not work, unless you config the Raspberry pi to force the sound output to 3.5mm jack.
You may adjust the volume by the command:
alsamixer
As we will use USB sound dongle for Echolink finally, you may bypass this audio output test.
We plug the USB sound dongle, and the USB to RS232 cord to the Rpi, and then reboot Rpi.
We check the USB devices after reboot, ensure found the USB sound dongle, and USB to RS232 cord.
lsusb
We need change the default sound device from the onboard chipset to the USB sound dongle.
Please edit the alsa config file by the following command:
sudo nano /usr/share/alsa/alsa.conf
change line 68 & 69 ‘s 0 to 1
defaults.ctl.card 0
defaults.pcm.card 0
defaults.ctl.card 1
defaults.pcm.card 1
Save and Exit.
Reboot the Rpi afterward.
Go to the alsamixer, to check the default sound device changed to the USB sound dongle on the left top side.

Please set the mic and speaker volume level to around 70% for test. You may change the value depend on the result.
Here is my final setting.

Press escape to exit the mixer.
The installation was completed. The steps are simple and easier then before, we no need to compile from the source code.
Configuration
We need edit 2 config files if want to use svxlink as an Echolink node:
/etc/svxlink/svxlink.conf
/etc/svxlink/svxlink.d/ModuleEcholink.conf
If you also want Airport weather report, you also need edit:
/etc/svxlink/svxlink.d/ModuleMetarInfo.conf
Please refer my previous article for the airport weather report, it will not repeat here.
Please edit svxlink.conf by following command:
sudo nano /etc/svxlink/svxlink.conf
At the [GLOBAL] section, please remove # of line 13,14. As we use the sound card in mono mode, and show the location information.
CARD_CHANNELS=1
LOCATION_INFO=LocationInfo
At [Simplex Logic] section:
Line 21, We add ModuleMetarInfo to get the Weather report for dedicated airport
Line 22, We change to our callsign
At [Rx1] section:
Line 169, we change the 0 to 1 , result:
AUDIO_DEV=alsa:plughw:1
At [Tx1] section, we change 0 to 1 of the AUDIO_DEV
AUDIO_DEV=alsa:plughw:1
As I use USB to RS232 cord for PTT, the 4th to 6th line of this section change as follow:
PTT_TYPE=SerialPin
PTT_PORT=/dev/ttyUSB0
PTT_PIN=RTS
At [LocationInfo] section, remove # of necessary line, and fill your station information. You may refer my previous article for detail.
Echolink configuration setup:
Please edit ModuleEchoLink.conf by the following command:
sudo nano /etc/svxlink/svxlink.d/ModuleEcholink.conf
In line 5, remove the # of the line
In line 14-17, please fill in your callsign, echolink password, sysopname and Location brief information
In line 28, remove # of the line to enable default language to US English.
General Reminder
If you are a new comer of Echolink, you should ensure your network firewall allows Port 5198,5199 ; UDP protocol passes though.

Most of the Board Band router configuration got this setting.
You may use the Echolink Client program to test your network environment. Please refer my previous Echolink article for details.
Run
Unlike previous we need type command to execute the svxlink, the 17.12.2 version of svxlink was run in back ground daemon when the Rpi boot up.
You may observe the resources by this command:
top
You may stop if by the following command:
sudo systemctl stop svxlink
If you like to run Svxlink in debug mode, to shows the operation details, please stop the svxlink manually, then run
sudo -u svxlink svxlink
YouTube Demo:
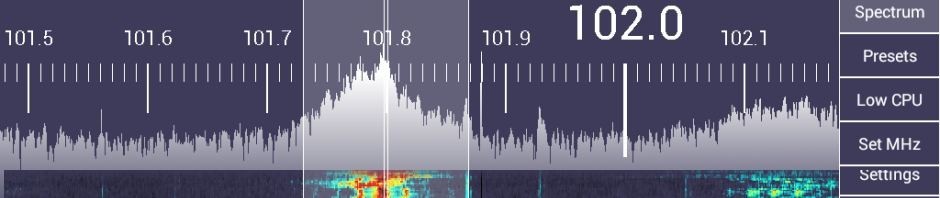
New feature test: RTL-SDR dongle for receiving
Starting from svxlink version 15.11, it supports RTL-SDR dongle for extra channel receiving. I spent many times for this experiment but still un-success.
Until this moment, I cannot found any useful information, or demo on the setup.
Anyway, I will share my experience here.
First, we need install rtl-sdr driver for raspberry pi.
git clone git://git.osmocom.org/rtl-sdr.git
cd rtl-sdr
mkdir build
cd build
cmake ../ -DINSTALL_UDEV_RULES=ON -DDETACH_KERNEL_DRIVER=ON
make
sudo make install
sudo ldconfig
Please reboot afterward, plugin the rtl-sdr dongle, you should seen it by command lsusb:

To support 1 more receiving channel, we use the Voter function in the Svxlink.conf .
Edit Svxlink.conf, we change some parameters:
At [SimplexLogic] section, change the RX=Rx1 to Voter.

We need add a new section call DDR, under the section Rx1. Here is my setting together with section [WbRx1] .
[DDR]
TYPE=Ddr
SIGLEV_DET=DDR
SQL_DET=SIGLEV
SIGLEV_SLOPE= -0.94
SIGLEV_OFFSET= -185.16
SIGLEV_OPEN_THRESH= 30
SIGLEV_CLOSE_THRESH= 5
FQ=435150000
MODULATION=FM
WBRX=WbRx1
[WbRx1]
TYPE=RtlUsb
DEV_MATCH=0
HOST=localhost
FQ_CORR=1
GAIN=0
PEAK_METER=1
SAMPLE_RATE=960000
We need to know the value of the parameters:
- SIGLEV_SLOPE
- SIGLEV_OFFSET
- FQ_CORR
We use the following command to get the FQ_CORR figure first:
devcal -Mw /etc/svxlink/svxlink.conf DDR
You will got the tolerance value of your RTL-SDR dongle.
My one equipped high precision 1ppm Tcxo. So I got 1ppm result.

Then we run this command to get the values of the rest parameter:
siglevdetcal /etc/svxlink/svxlink.conf DDR

Finally, we need to add DDR to the Voter section:

As I know, here is the steps need for RTL-SDR dongle to receives more channel.
The Voter function work, but nothing can be listen by this Rx only channel.

Conclusion
The Svxlink 17.12.2 are easier to install and config than before. And although my test is using analog handheld transceiver, it should also work by digital mode such as DMR radio.


