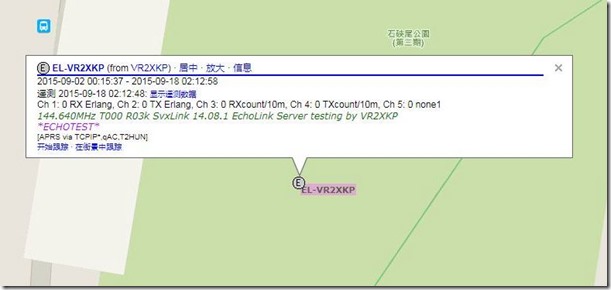
Although my blog concentrate on the APRS and Digit Radio technologies, but the most popular article is Echolink “Life of Pi” published in 2013 obviously.
In these years, I received many feedback on the article as well as YouTube channel. Most of them are the stability of Svxlink running on Raspberry pi.
And the procedure of the installation.
In this article, I will testing the latest svxlink 14.08.1 in newest Raspberry Pi 2 Model B. The USB sound card dongle, USB to RS232 cord is same as previous.
Here is the key points of svxlink 14.08.1
- It use CMake to build the svxlink, it is different with previous article
- It should add a user “svxlink” before svxlink installation
- A sound config file disappear, so can be ignore here
- The 16k sound clip file as default
- The default installation path changed
OS preparation
Please download the latest Raspbian image (5-May-2015), write the image to a 4G Micro SD Card according the official tutorial.
Insert the card to RPi 2, power up and enter the configuration menu.
Set the locale to your country, keyboard to US. (Internationalisation options -> change time zone ; change Keyboard layout )
As Svxlink work in text mode, we reduce the GUI RAM from 64M to 16M.
(Advanced Options -> A3 Memory split –> from 64 decrease to 16 )
if your SD card > 4G, please select expand to us full capacity of your card, then finish to reboot. ( Expand File System )
The OS preparation is complete. Please login after reboot. Then shutdown the Rpi by command: sudo shutdown -h now
Hardware preparation
Please insert the USB sound card dongle to a USB port of Rpi.
Please insert the RS232 to USB cord to a USB port of RPi, I am using the PL2303 chipset cable which the driver was buildin the Rpi. In another test, I found FT232 driver was absent on Rpi, it needs install by the user.
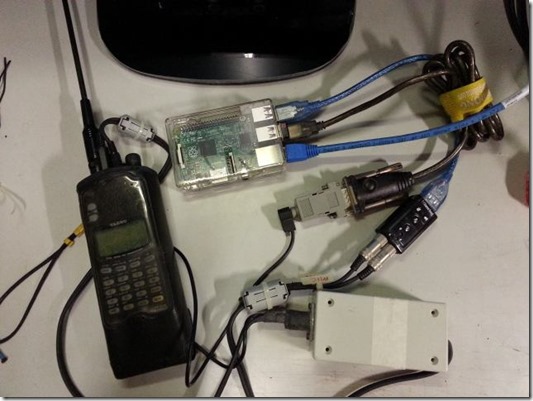
Insert a USB keyboard. Then power up your RPi.
After login, type command lsusb , you should see the list of USB devices. If some device missing, you may continue to proceed the following software & firmware update, However, all the critical devices (sound card, and USB to RS232 cord) should be identified before svxlink installation.

Software & Firmware update
Please input command to update the pre-installed software:
sudo apt-get update && sudo apt-get upgrade
Please input command to update the firmware:
sudo rpi-update
Please input command to reboot the system afterward:
sudo reboot
You may found a warning on the boot up screen.
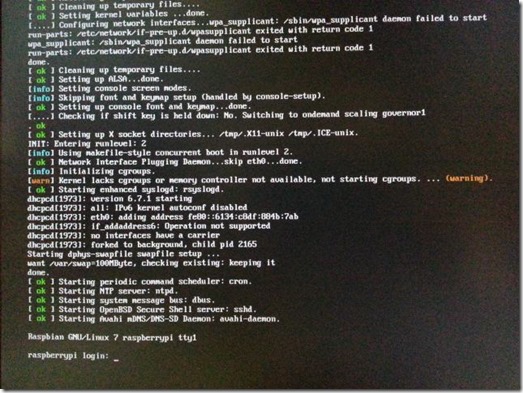
It will not affect the whole operation. And we can edit a file to settle the problem:
sudo nano /boot/cmdline.txt
Please add ”cgroup_enable=memory “ before the ” elevator=deadline”
Select Ctrl + X, select yes to save the file.
Reboot the system and the warning should disappear.
For new RPi user, you may consider backup your SD card here.
SvxLink installation
Add user “svxlink” by following command, password according your own.
sudo adduser svxlink
Please install the prerequisite packages by the following command:
sudo apt-get install g++ make libsigc++-2.0-dev libgsm1-dev libpopt-dev tcl8.5-dev libgcrypt-dev libspeex-dev libasound2-dev alsa-utils libqt4-dev
Please install CMake by the command:
sudo apt-get install cmake
Download the svxlink latest package 14.08.1 :
sudo wget https://github.com/sm0svx/svxlink/archive/14.08.1.tar.gz
Please unzip it:
tar xvzf 14.08.1.tar.gz
Please enter the unzipped folder :
cd svxlink-14.08.1
Go to subfolder “src” :
cd src
Make a folder “build” :
sudo mkdir build
Go to the folder “build” :
cd build
Execute the commands step by step, the two dot after a space means use default path:
sudo cmake ..
sudo make
sudo doc
sudo make install
It need around 20 minutes for the installation. Ensure no error message prompt after the installation.
Update the libraries link by the command:
sudo ldconfig
The installation was completed. You may reboot the system, or input cd.. 3 times to return root directory.
Sound Clip files installation (US English)
Please download the 16k sound clip file:
wget https://github.com/sm0svx/svxlink-sounds-en_US-heather/releases/download/14.08/svxlink-sounds-en_US-heather-16k-13.12.tar.bz2
Unzip the file:
sudo tar jvfx svxlink-sounds-en_US-heather-16k-13.12.tar.bz2
Make the folder default to save the sound clip:
sudo mkdir –p /usr/local/share/svxlink/sounds/en_US
Go to the unzipped file folder:
cd en_US-heather-16k
Copy all files to the default location:
sudo cp –r * /usr/local/share/svxlink/sounds/en_US
The sound clip installation completed. Please reboot the system now, we will edit some configuration files afterward.
There are 3 configuration files need to edit, They are:
/etc/modprobe.d/alsa-base.conf
/usr/local/etc/svxlink/svxlink.d/ModuleEchoLink.conf
/usr/local/etc/svxlink/svxlink.conf
There are NO asound.conf anymore.
Edit alsa-base.conf :
sudo nano /etc/modprobe.d/alsa-base.conf
Row 17, please change -2 to 0 at the end of the string. So the string is
options snd-usb-audio index=0
Press Ctrl + X, select Yes to save the file. Then Reboot.
After login, input command alsamixer . Your will see it is USB sound device on the left top side.
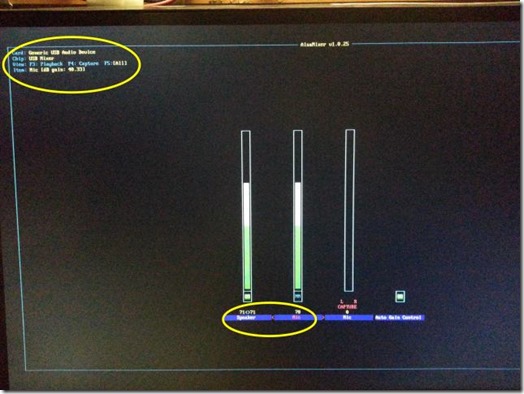
Please adjust the speaker and mic volume to around 70 .
Press ESC to leave.
Edit ModuleEchoLink.conf :
sudo nano /usr/local/etc/svxlink/svxlink.d/ModuleEchoLink.conf
On Row 5, remove # at beginning, it make the IP and subnet mark enable.
On Row 14-17, edit to your own information, e.g: Callsign
On Row 28, remove # at beginning to use US English
On Row 34-38, edit the information according your station configuration.
Press Ctrl + X, select Yes to save the file.
Edit svxlink.conf :
sudo nano /usr/local/etc/svxlink/svxlink.conf
On Row 13, LOCATION, remove the # at beginning.
On Row 20, MODULES, remove “ModuleParrot,ModuleTclVoiceMail” on this moment. We will add the MetarInfo module later.
On Row 21, 45; change to your callsign.
On Row 22, as I prefer report callsign every 15min, so I change it to 15.
On Row 28, RGR_SOUND_DELAY set to 100. It is more easy to hear the roger beep before end of transmission.
On Row 29, add # on the beginning. As no PL tone used.
On Row 34 & 36, remove # on the beginning. So we can use DTMF command to on/off module when necessary.
On Row 171, change to SERIAL_PORT=/dev/ttyUSB0
On Row 172, add :SET to the end of the string. So complete string is SERIAL_PIN=CTS:SET
On Row 193, add # on the beginning as we did not have DTMF hardware decoding.
On Row 206, Change to PTT_PORT=/dev/ttyUSB0
On Row 221-229, please enter your co-ordination, and station information. They will shown on aprs.fi map.
Press Ctrl + X, select Yes to save the file.
Please reboot the system. All the setup completed.
GPIO to PTT
If some Ham would like to try PTT via GPIO, please refer the chapter “Using GPIO has its own challenges” from the official guide.
https://github.com/sm0svx/svxlink/wiki/InstallSrcHwRpi
Any new feature ?
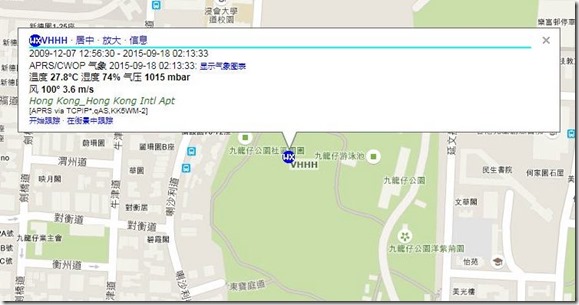
Yes, Airport weather report announcement !
Please follow the following steps:
sudo nano /usr/local/etc/svxlink/svxlink.d/ModuleMetarInfo.conf
Row 5-7, remove the # on the beginning.
Row 5, STARTDEFAULT=VHHH
(VHHH is the ICAO code of Hong Kong International Airport. Please replace it by your nearby airport ICAO code.)
For the last Row, you can use DTMF to select which airport your want to knows the weather report. Enter the airport ICAO codes you like. At least 1 airport ICAO code need.
Note to an Echolink node for long term running
Rpi is a PCBA, please be remind if use it for long term operation:
- An enclosure with appropriate heat dissipation. I did not add any heat sink to the chipset and it seems OK.
- A good power supply. I am using an old Samsung smartphone power adaptor (5V, 2A) for the project. Please be remind these kind of switching adaptor cannot withstand on strong RF interference, please put it away from the transmitter.
- Audio cords, Power cord please add Ferrite Core.
- I use a Cat 6 cable, to replace a flat cat5 cable. Those flat network cable available on the market seems no good for anti RF interference.
YouTube Demo
Conclusion
The svxlink is not design for Rpi platform, but the version 14.08.1 as echolink node seems operated smoothly, I will conduct a long term operation test, if the results is good I will enable others modules such as voice mailbox in the future.
Have fun.


